Irises: A Beginner’s Guide for Late Summer Planting

unnamed

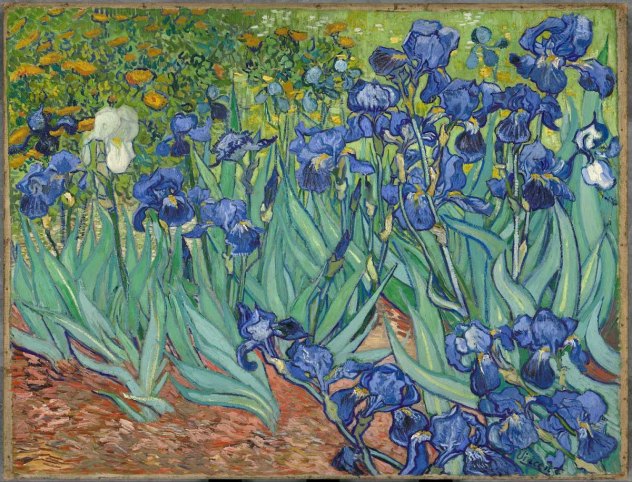
“Irises” by Vincent van Gogh, which sold for $53 million at auction

Come late summer, a gardener’s thoughts immediately turn to spring. Most likely, planting tulips or daffodil bulbs come to mind, two of my favorite flowers. However, a good friend of mine, Traci, recently moved to the area. She bought a new house and had a blank slate as far as planning her garden is concerned. She planted the idea of new iris beds for us both. And an obsession was born!

As good friends do, we fed off each others’ enthusiasm for a new undertaking. Now that both of our gardens are in, and you still have time this year to plant one of your own, I thought I’d share some of our learnings with you.

iris1A1

First, a bit of iris history. The iris, famously used by the French Kings, including Louis XIV, as a symbol of power and position, was adapted as the Fleur de Lys and is now a symbol of the great state of Louisiana. Before World War II, most new iris hybrids came from Europe. But since that time they have become an American passion, and can be enjoyed in all their regal splendor, standing tall in late spring, alongside the poppies and peonies.

Although people often refer to planting iris “bulbs”, the bulbs are actually called rhizomes. The rhizome is planted right at ground level, the tops just visible, and its adventitious roots make it possible for many plants to propagate from the stem. While the rhizome grows horizontally, it rises into a beautiful fan of sword-like leaves with showy, spectacular flowers in a rainbow of colors.

14107616_1507777192581780_8231629248261300294_o

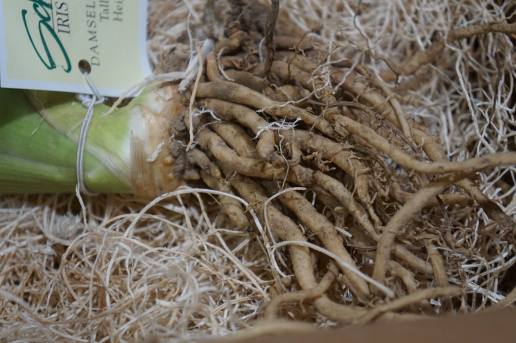
The healthy roots of an iris rhizome

I’ve compiled a couple of “Iris Newby” tips that my friend and I have learned, that hopefully will be helpful to you, too.

Where to Find Your Rhizomes. Don’t let the cost of irises deter you from starting a bed of your own. One of the best features of these hardy perennials is how quickly and abundantly they reproduce. Iris typically have to be divided every four years. So you can most likely find some neighbors, friends, family or coworkers who would be delighted to share some of their bounty with you. Gardeners are by nature eager to share knowledge and the fruits of their labor.

14059983_1469529756406364_416118174_o

An elderly neighbor of Traci’s, who could no longer garden, generously offered her as many irises as she’d like. This is what Traci ended up with, and she shared with me.

Another fantastic and inexpensive method of procuring your precious rhizomes is to find the local chapter of the Iris Society, through an arboretum, or horticulture department at a local university. Traci and I attended the annual sale of the Iris Society of Minnesota and found award-winning irises at a fraction of the price, that we knew would do well in Minnesota’s unique climate. We were also able to benefit from the experience of Master Growers, such as this lovely gentleman, who was more than happy to help a couple of beginning iris enthusiasts out.

Finally, there are many sources for high quality, distinguished irises online. Perhaps the most venerated is Schreiner’s Iris Gardens. While a peek at the 2016 edition of their Iris Lover’s catalog features resplendent Irises for $50-$60 a bulb, I shopped their summer sale and purchased several for under $10 a piece. Plus, they will throw in a bonus Iris, if you meet certain thresholds.

14107676_1507777189248447_8738025101718326022_o

Once we had all of our iris selected in the colors we favored, (both of us love the purples and blues. I also like the pinks, and yellows. Traci hates yellows and goes for some of the deep reds), it was time to prepare the beds. Irises will ship in July, August and September. They should be planted in late summer, earlier than tulips or daffodils, because they need time for the roots to get established, prior to the temps falling below 40 degrees.

Choosing a site. You’ll want to select a site where you’re going to get full sun for at least 6 hours a day. Choose a spot that doesn’t get standing water. Remember irises don’t like wet feet. You’ll need to amend the soil if you have heavy clay soil. Most importantly, choose a spot where you will be able to see and enjoy them in bloom, and hopefully, passersby will be able to enjoy them, too.

Preparing the Bed. Again, Iris do not like wet feet. You’ll need well-drained soil. Like most perennials, Iris prefer neutral to slightly acidic soil. You’ll want to use fluffy compost or aged manure, and light black dirt.

2 Final

We cleared a site, where a previous home owner had planted iris over two decades ago. The soil was compacted under gravel, so we uncovered down to the clay, turned it over, and added aged, composted manure and light, fluffy black dirt.

2A Final

Next, I set out all my bulbs, according to color and size. All of mine are Tall Bearded Iris, so mine were arranged by color scheme. You’ll want to plant them 1-2 feet apart. The closer together they are planted, the sooner you will have to divide them.

3 Final

Finally they were planted, so that the rhizomes were just visible above the soil or had a very light covering, with the roots fanned out to the sides, pointing down.

Finally, I created a map of what I’d planted and where. Anyone who has ever planted a perennial garden will attest to the fact that markers tend to mysteriously migrate, or disappear, and you end up not knowing what is where until it blooms.

Traci found some darling garden markers on Pinterest that she made for both of us, using beads from the craft store. I’m sure I have the nicest garden markers on my block. But plastic markers and a Sharpie will work as well.

While I love all four seasons in Minnesota, I can hardly wait until next spring to enjoy the fruits of my labor, as well as to share with my friend yet another mutual passion that sustains our friendship. For more information on growing irises, I encourage you to check out the American Iris Society.


Smart Perks Blogger, Melanie Bisson enjoys getting dirt under her nails as much as a good manicure afterwards.


Beware of Poisonous Plants

Mesa Verde National Park - Poison ivy

My husband and I live on 10 acres, most of which are woods and pasture. We used to have sheep and horses to eat up the long grass and keep the weeds at bay.  Now that we don’t have any animals, these annoyingly prolific plants have taken over our front pasture, turning it into a regular weed-fest complete with a colony of stinging nettles. (If you’ve ever brushed up against these prickly pests you know what a pain they are, literally!) I wouldn’t be surprised if there’s poison ivy or oak lurking in our woods as well.

The fact is you’ll find menacing vegetation almost anywhere – in ditches, forests, fields and pastures, in your yard and garden, or even in potted outdoor plants.

Chances are you’ll be spending a lot of time outdoors this summer, whether it’s hiking, gardening, playing sports, camping, or working in the yard. That’s why it’s so important to be aware of your surroundings and beware of plants that are poisonous.

Common Plants that Can Be Harmful to the Touch

Poison ivy and oak

“Leaves of Three, Let Them Be!”

Poison Ivy, Oak and Sumac: These pestilent plants contain an oily sap called urushiol, which is found on the stems, leaves and roots of the plant. The tenacious resin sticks to practically any surface (clothing, shoes, garden tools, camping gear, athletic equipment, even pet hair) and can easily transfer to your skin, causing an itchy, red rash which could surface within hours or even up to four days after exposure. Visit poison-ivy.org for all the facts.

WildParsnip

Wild Parsnip spreads like wildfire and causes severe burns and blisters.

Wild Parsnip – often found along roadsides, in ditches, pastures and open fields, this wicked weed reacts to sunlight, resulting in serious burns and blisters. Read this recent report from CBS News It’s alarming!!

More Phototoxic Plants (ones that become toxic when exposed to sunlight): celery, carrots, dill, parsley, limes, and figs.

Chrysanthemums (aka, mums)

Euphorbia (Spurge)

Flower bulbs (e.g., hyacinth, narcissus, daffodils, lilies, tulips)

Burning & Stinging Nettles

Prickly plants like roses, thistle, cacti, wild blackberries and raspberries

Campsis radicans (trumpet vine, or trumpet creeper, or cow itch vine, or hummingbird vine)
Trumpet Creeper – it may look beautiful, but don’t be rash! Touching it may cause an allergic reaction, plus it’s slightly toxic if eaten.

Geraniums and Marigolds

Giant Hogweed (heracleum sphondylium)
Giant Hogweed – these umbrella-shaped flowers with big leaves can cause painful skin and eye irritations.

Tasty, but Deadly  
Some people like to add petals or leaves to tea, salads and different culinary dishes or use them as garnish for desserts. And, oftentimes our pets will nibble on plants. But, there are several kinds of flowers and greenery that should never be on the menu as they can make you (or your furry friend) seriously ill.

Click here for an extensive list of poisonous plants and plant parts.

Not sure what plants are safe for your pets? You’ll find a list of toxic and non-toxic plants at aspca.org.

Preventative Measures

  • Wear protective clothing (e.g., long sleeves, pants, shoes/boots with socks) when hiking in areas where these types of plants grow.
  • Wear gloves when gardening, weeding, trimming shrubs, and doing yard work.
  • Wash any garden tools, sports gear or other objects with soap and water after using them.
  • If you think your pet’s been rolling around in poison ivy or other suspicious plants, give him a bath with pet shampoo and water (be sure to wear rubber gloves).
  • Don’t burn poisonous plants as the noxious substance can go airborne and get in your eyes, nose, mouth, and lungs.
  • Stay away from plants with three leaves (e.g., poison ivy and oak), but don’t rely solely on the “leaves of three, let them be” notion. Some, like Poison Sumac, can have up to 13 leaves.

Remedies/Treatments

  • Rinse your skin with cold water right away – avoid soap, however, as it can spread the resin. Don’t forget to scrub under fingernails too.
  • Take a cool, oatmeal bath – I recommend Aveeno Soothing Bath Treatment – to help dry up any blisters and weeping rashes.
  • Apply a topical cream or lotion with calamine and zinc oxide to affected areas.
  • Take an oral antihistamine – like Benadryl – to help relieve some of the itching and skin irritation.
  • If you experience a severe reaction – e.g., swelling, difficulty breathing, trouble swallowing, nausea, or signs of an infection – see a doctor or head to the emergency room immediately!

Since I’ve barely “scratched” the surface on this subject, I recommend doing some research on your own.  Check out these sites to learn more about poisonous plants, what they look like, where to find them and the side effects.

Aggie-horticulture.tamu.edu

Canaryzoo.com

Everydayhealth.com

Be careful out there!

Smart Perks Blogger Catherine B. has suddenly developed a case of Botanophobia (fear of plants). 


Planting Herbs: A Feast for the Senses

MainHerbImage_DSC01724_ALT

If the thought of a garden nursery or farmer’s market makes your pulse quicken, then you’re probably familiar with the intoxicating allure of the herb. Even if I never once used my herbs for cooking, I would still plant them every year, because they are literally a feast for the senses, their heavenly aromas released with a touch, stunning colors and foliage, wonderful variety of textures, and oh, the taste of fresh versus dried herbs! C’est magnifique!

Martha Stewart & the British pronounce them with a Her rather than a Ur, which always makes me laugh because I think of my Great Uncle Herbie and the 70s classic Herbie “The Love Bug”.  But I digress.

Before I plant my window boxes or garden, I plant herb bowls. I can plant them early in the season, and if the temps are going to fall too low, I can easily bring them indoors or cover them to protect against frost damage. Basil is especially susceptible to damage from the cold weather, and should not be planted outdoors until all danger of frost has passed.

Another reason I love herb bowls is because I can get creative with mixing and matching complementary plants for simple aesthetics. My favorite pot would contain a variety of different colors and textures. For instance, thyme is one of my all-time favorite herbs for container gardening, because it comes in so many beautiful varieties. I love the tiny green teardrop leaves on woody stocks. My favorite thyme plants are English Thyme, Woolly Time, a wonderful fuzzy creeper, and Lemon Thyme, with its gorgeous variegated foliage and fresh citrus scent.

5Plants_DSC01736_ALT

Clockwise: Pesto basil, lemon thyme, english thyme, rosemary and french lavender

A good rule of thumb when planting for aesthetics is to plant one tall plant such as a silvery rosemary or chives, a trailing plant like creeping Rosemary, a small to medium-sized colorful plant, like a purple sage or purple basil, a bright lime green plant thyme, and a specialty variety oregano.

Or, I can plant for a more utilitarian theme, like a bowl containing the most common herbs for cooking (basil, oregano, sage, chives and thyme or rosemary), or, for sweets, teas, soaps and oils (chamomile, lemon verbena, mints and lavender).

4Plants_DSC01730_ALT

Clockwise: Peppermint, purple basil, woolly thyme, and golden sage

When I say mint, you probably think peppermint. But there is quite a variety of mints to choose from, including pineapple or chocolate. My favorite cheap thrill of summertime is to pluck a fragrant leaf or two of pineapple mint and just inhale the deliciousness.  A word of caution, though: mint is best grown in pots as it is an aggressive grower, and will quickly take over a garden, spreading year after year.

Watering – Unlike house plants, herbs need to be watered frequently. The good news is unless left for several days without water, most herbs will bounce back from wilting once watered. During hot summer days, you may have to water at least once a day. They should never be allowed to dry out, completely.

Clipping & Pruning – Using basil as an example, when clipping, start towards the top. That’s where the tender, young leaves are. The large, older leaves at the bottom of the plant absorb the energy from the sun that helps produce new leaves. With basil, and other herbs, you should never allow them to flower unless you’re growing them for decorative purposes only. All of the plant’s energy goes to the flower instead of producing new leaves. You want your basil growing out, not up.

Storing Fresh Herbs – Most cut fresh herbs will keep for at least a week, wrapped in a damp paper towel and stored in a sealed plastic bag in the refrigerator.

Cooking  – One tablespoon of chopped fresh herbs will equal approximately one teaspoon of dried herbs. Or you can simply remember you’ll typically need 3 times the amount of fresh herbs as dry.

I have to share two of my favorite ways to use fresh herbs, beyond pizza and bruschetta.

I could eat Italian food, seven days a week, 365 days a year. A hearty red sauce is my favorite. However, every home chef should have at least one classic summertime pesto recipe. Here is one from The Barefoot Contessa herself, Ina Garten. While many know her now from Food Network, I have all of her cookbooks. She is a true icon! http://www.foodnetwork.com/recipes/ina-garten/pesto-recipe.html

Another summertime staple at my house is Herb Butter, which can be made sweet or savory. You can’t go wrong with a lemon thyme herb butter, which is fabulous on pasta, fish or hot, crusty bread. And, it couldn’t be simpler to make, so you’ll spend less time in the kitchen and more time outdoors.

Lemon Thyme Herb Butter

½ cup softened butter

2 tsp. flat leaf parsley (finely chopped)

½ tsp. lemon thyme (finely chopped)

2 tsp. lemon zest

Roll on wax paper into a tube shape. Refrigerate until hardened.  Slice off a round pat when ready to use. Garnish with a thinly sliced lemon half or a sprig of curly parsley.

However you use them, from salads to steaks, I hope you enjoy a summer full of delicious herbs!

Pinterest_•_The_world’s_catalog_of_ideas_-_2016-05-19_13.26.37

For a free download of this darling watering can cross-stitch from Country Living visit http://bit.ly/20bD3Hp.

Smart Perks Blogger, Melanie B., enjoys fresh herbs for their scent as much as their taste!

All uncredited photos taken by Mary Haehn.


Banish Blossom Rot & Save the Salsa!

Ripe tomatoes in greenhouse

Are you celebrating opening day this week? Baseball? No. No. No. Farmer’s market opening day, silly!  Our local market officially opens for the season this Saturday.

It’s a day I look forward to all winter long. Time to start planning the garden, and deciding which veggies I’ll put in this year.

Tomatoes, however, are a no-brainer. I’ve planted about 18 vegetable gardens of my own over the years.  And tomatoes are always the stars of the show.

If there is a mistake to be made in planting tomatoes, I have made it.

I’ve started tomatoes from seed, and experienced long, leggy seedlings that grew too thin and sideways, because I didn’t have a light source directly above, and didn’t rotate the seed tray enough.

tomato plants

My go-to tomatoes are Early Girl, Roma, San Marzano, Brandywine and Sweet 100s.

I’ve lost young tomato plants I started indoors, because I neglected to harden them off, by gradually introducing them to the outdoors for hours at a time, then bringing them back in.  These tender young plants need time to adjust to the elements – wind, direct sun, and temperature fluctuation. Truth be told, I just buy started plants at the farmer’s market now.

I’ve made the mistake of planting THREE cherry tomato plants (Sweet 100s are a fave) and ended up with eight billion of the sweet little nuggets of tomatoey goodness – more tomatoes than any one family could eat in a lifetime.

Close up of cherry tomatoes growing in a vegetable garden

But most distressing for me are the common problems that tomato-growers everywhere have experienced at one time or another that occur once the tomatoes start to bear fruit. By that time, it’s almost too late to salvage the plant for the season, and all that nurturing was for naught.

So rather than wait to diagnose tomato troubles mid-season, this year I decided to do some research to head them off at the pass. Stop blight, blossom rot and cracking before they have a chance to take root. Here are some of my top tomato tips:

  1. I have a relatively big garden for a small suburban backyard. It’s approximately 40 feet long. There are a couple of reasons why this is important. First, plant spacing. Adequate spacing between plants prevents the leaves of one plant from touching those of another. Not only does this allow air to circulate, but it prevents disease and pests from easily transferring from one plant to another. Secondly, I rotate my crops. Diseases can stay in your soil from year to year, so I try not to plant my tomatoes at the same end of the garden, or in the same row for consecutive years. Note: Planting tomatoes in a large pot on a patio is a fantastic option for apartment dwellers. I’ve done this, too. You’ll be surprised at the number of tomatoes that one well-cared for plant will produce.
  2. Have you ever had your soil checked? This isn’t an absolute necessity. But it takes the guesswork out of whether your tomato plant is getting the nutrients it needs to thrive. I like to add well-composted, aged manure directly to the soil I’m planting in.
  3. Plant tomatoes deep. A good rule of thumb is 2/3 of the plant should be underground. Planting tomatoes deep will help establish a stronger root system which helps them to survive hot weather and support more fruit.
  4. Support your plants. My grandpa always used 2-inch wood stakes and tied the stems to the stakes with one-inch strips of his old t-shirts. They sell special spongy ties now, but the t-shirt trick is more economical. I use tomato cages myself. I found some round cages that are powder-coated in rainbow colors that make me happy and brighten up the garden. They’re thick and sturdy enough that I don’t have to replace them every year like the other thin or collapsible cages.
  5. Mulch! Mulching around the base of your tomato plants will prevent a variety of the most common tomato maladies. Not only does mulch help conserve moisture, but it also helps prevent the spread of disease. Straw works great as mulch, but there are a variety of other mulches available at your local garden center.
  6. Water! Almost every tomato problem you can name from cracking to blossom rot stems from uneven watering.
Cracked tomatoes

Cracking from uneven watering

Cracking for instance develops as a result of uneven watering, or a period of drought followed by over-watering. The skin can’t stretch to accommodate the fluid build-up, and splits.  The tomato becomes like an over-filled water balloon.

Blight is a fungus that shows up as those dark concentric circles on yellowed leaves, which can occur from wet leaves. Sometimes simply removing damaged leaves is enough, but if the weather won’t comply, you’ll need to remove the whole plant.

Blossom Rot

Blossom rot – Add more calcium

Blossom rot is another problem brought on by drought stress and inadequate watering resulting in a lack of calcium in the soil. The calcium doesn’t move up through the plant quickly enough and the tissue on the blossom-end, turns black and breaks down. You can spray tomatoes with a calcium solution as a stop-gap measure.

A good rule of thumb is to water regularly, but sparingly. Your tomato plants need approximately 1 – 1 ½ inches of water a week. A good soaker hose with a timer is your best bet.

Finally, tomatoes degrade and lose flavor if left too long on the vine or exposed to temperature of 40 degrees or less. You can tell a ripe tomato by a green gel around the seeds. Once the gel turns clear, the tomato is overripe and the flavor diminishes.  Store your ripe tomatoes on the counter to keep them ripe and flavorful as long as possible.

Did you know that adding Epsom salts to amend the soil results in larger, tastier yields? Have you tried adding coffee grounds, egg shells or fish scales when planting your tomatoes? If you have any tried and true tomato tips, I would love to hear them. Please share in the comments!

Smart Perks Blogger, Melanie B, will be up at 6 a.m. on Saturday to get her parking spot at the Minneapolis Farmer’s Market.

Gifts Inspired by Nature for Mom

DSC01592

Artwork by Cindy Hendricks of Woodfield Press

“Just living is not enough. One must have sunshine, freedom and a little flower.”  Hans Christian Andersen

On a chilly April morning, with such a deceptively brilliant blue in the sky, my desire to get outside and do something overwhelmed my common sense knowledge that we had at least a couple more sub-freezing degree nights ahead of us. But, I couldn’t stop myself. Our local farmer’s market doesn’t open until April 16th, however my determination to surround myself with the joys of springtime in the backyard was overwhelming.

Once inside the hothouse oasis of the local nursery, my senses ran amok. Being that my husband has expressly forbidden overcrowding our house and yard, I came up with the brilliant idea that Mother’s Day is just around the corner, and no one could deny me the right to buy gifts for mothers – mine, his and anyone else’s mother.

So, I put together a selection of some gifts that are a little different from the traditional chocolates and delivered arrangements. I think there’s something for all the moms who enjoy a little sunshine, bird chirping and digging in the dirt.

Mary Enblebreit

Beloved Artist Mary Englebreit has created a magical collection of garden fairies for her Merriment collection, featuring delightful little sprites from reading fairies to artist fairies, and all the darling accessories to brighten up a miniature garden this summer. All can be found at  http://www.maryengelbreit.com/collections/garden.

Pots

Pops of color will enhance every flower garden and landscape, attracting butterflies, hummingbirds and bumble bees. Mom will enjoy hours watching an endless array of bathing beauties – blue jays, chickadees and woodpeckers, fluttering their wings at her bath.

DSC01599

Two things Mom can use at the beginning of every gardening season, are a good pair of flower sheers for deadheading her flowers and a nice pair of garden gloves, like these cheerful pink polka dot models. They’re neoprene and thin, so they give you the necessary practicality you need for planting seedlings, and they wash up nicely when covered with mud.

DSC01608Placing bright flowers and hummingbird feeders near windows Mom frequents is a great way to enjoy a summer full of cheerful winged feeders. The simple syrup used to fill hummingbird feeders is very easy to make. No need to add red food coloring, as the birds are equally attracted to clear syrups.

DSC01605Another meaningful gift that mom doesn’t always think of herself is planting a memorial garden. I myself have found them to be very healing.


Not only do I feel a spirituality when I’m outdoors, reflecting on the tranquility of nature, but there is a gentle reminder of the cycles of life, that provide us with solace. One of the best memorials I was ever given – an apple tree – was when my grandfather died. Thirteen years later, I think of him every springtime when it blooms. The idea has become so popular that many garden centers carry memorial stones or lights, along with companion flowers.

After mom is done in the garden, she’ll want to pamper and soothe herself with relaxing gifts she can enjoy in a nice steamy, hot shower or a luxurious bath, filled with the luscious scent of garden botanicals.

Soap

Or you can treat her to a little pot of sunshine she can enjoy indoors on a cold and rainy day.

And finally, Papersource has some amazing flower print wrapping paper that’s almost too pretty to use.

I hope you found a couple of good ideas to welcome the season of getting outdoors, if not for mom, then for a friend or  even yourself. As Henry James once said, “Summer afternoon; summer afternoon; to me those have always been the two most beautiful words in the English language.” Get out and enjoy one while you can!

Blogger Melanie Bisson, a Smart Perks employee, enjoys vegetable and flowering gardening, bird-watching, and SHOPPING!

Enchanting Miniature Gardens

use2
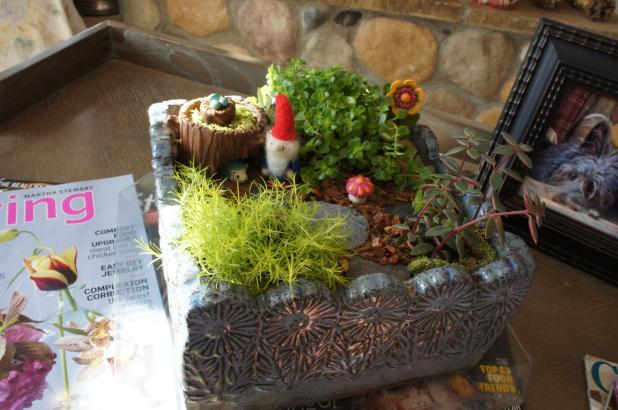
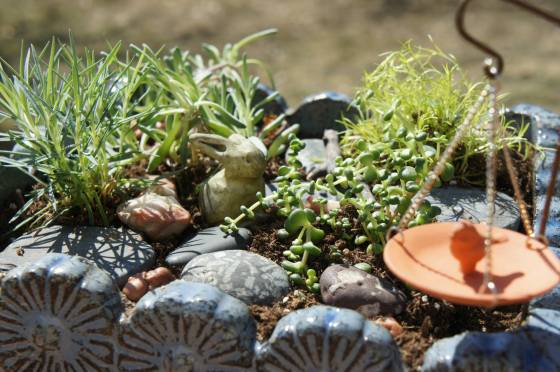
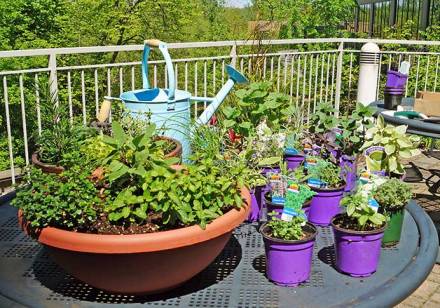
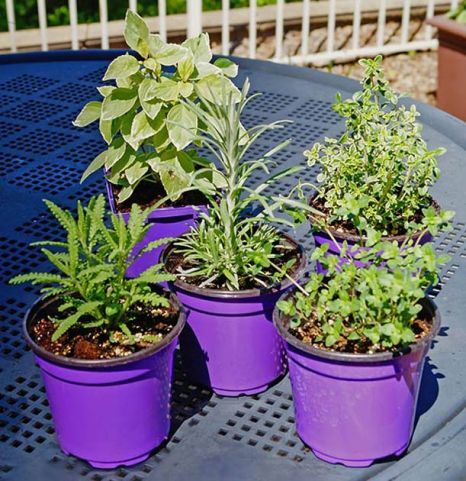
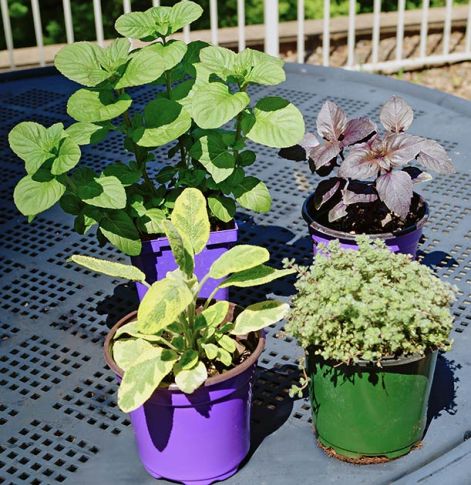
Springtime is the season of cute! My mind is full of bright colors and baby animals. I want to smell green grass and fresh dirt. I want sunshine, even on the days when the temperatures are still struggling to hit the mid-50s.

Spring can’t come soon enough for me and I need to do something green and creative. That’s why I love mini gardens so much. Even in the dead of a Minnesota winter, I am lucky enough to  have two amazing garden centers nearby with large greenhouses, featuring elaborate fairy gardens or gnome villages, like the one pictured above in Tonkadale Greenhouse.

Since I can’t start planting my garden until the danger of a hard frost has passed (in mid-May), a good alternative to full-scale immersion in outdoor gardening is to create a potted or miniature garden indoors.

use 7

You don’t have to live in a cold climate to enjoy miniature gardening. Container and terrarium gardening can be done anywhere and is simple enough for anyone. They require very little space. In fact you can create a tiny garden in a mug or teacup.

use6

Here are some quick tips that I’ve learned after several springtimes making mini gardens.

  1. Pick your container & your plants at the same time. Tiny, small-leafed plants, mosses and succulents are perfect for tiny gardens. I love to use Irish moss for ground cover. Most greenhouses now feature a section devoted to small plants for fairy gardens. These plants won’t get too big and crowd each other out. Check the tags on the plant for size guidelines. Or ask your nursery expert for some good suggestions for companion plants, given the size of your container. I like to mix it up with a couple of different small varieties of moss, ivy and ferns. Or, I’ll do all  succulents. Succulents are among the most forgiving of plants, and if you’re a plant newbie, they are harder to kill (I kid). use 8
  2. Plan for drainage. Remember, plants don’t like wet feet!  If your pot or container (you can use anything from a wood crate with a liner, a big bowl, a tin bucket, an old coffee can; I’ve seen some really cute mini gardens in repurposed containers) does not have a hole in it, providing adequate drainage is crucial. What I like to do, depending on the size of my container, is layer small stones or pebbles at the bottom of my container, with space for water to seep through. A thin layer of activated charcoal wicks moisture and absorbs any stagnant water odor. Dried moss can be used at the pebble layer to absorb excess moisture as well. 945239_657248600967981_589083094_n
  3. Use good soil. Choose a fluffy potting soil that is not too dense or too wet. I typically use Miracle-Gro, but any fluffy potting soil that allows air, moisture and nutrition will do. Depending on the size of my container, I use odd numbers of plants, based on the old decorating rule. For a medium-sized container, I will use three. I space them evenly, giving them room to grow, and tease the roots a little before nestling each little plant into it’s soil. Once the plants are in, I use extra fine sand, finely shredded bark, shells, or decorative moss as ground cover over the soil.
  4. Imagine and play. Then comes the fun part! Play time. I always start with a vision. I have little Zen gardens, cute gnome gardens, animal gardens, spring themed gardens, gnome getaways. Let your personality be your guide. I have a friend who loves the ocean and made a darling container garden using fine white sand, shells, and beach glass. use9
  5. Sunlight and water. Save the tags that come with your plants. Most miniature plants make good partners, requiring the same amount of light and water. I have always enjoyed my mini gardens indoors and then brought them outside, to the deck or patio, once the weather warms up.
  6. Enjoy! Caution: Creating these miniature vignettes with plants, and tiny little things that make you smile, is addictive. You start to see every small object as something that could serve a purpose in your miniature garden, from an acorn to agate or marble.

The miniature garden is the perfect March treat to tide you over until your warm weather plants can go in. But if you simply can’t wait, violas, or johnny-jump-ups, are a good cold-hardy plant that you could probably enjoy outside out today. Happy planting!

FlowersGnome_ALT

Blogger Melanie B., a Smart Perks employee, is a Zone 4 gardener who believes in fairies and gnomes.


Dog Days: Making Summer Safer for Your Dog

10003700_1149696715056498_8564484971828021804_o

Did you know the saying “It’s a dog’s life” means life is tough? WHAT? Obviously whoever coined that phrase never met my dogs. Spoiled rotten. As they should be. Right? My dogs LOVE summertime. It’s their favorite time of year. But there are a lot of things us pet parents need to be aware of to keep our beloved besties safe during the dog days of summer. Here are ten ways you can protect your pooch this summer.

  1. Flea & Tick Prevention – In some parts of the country, flea and tick prevention is a year-round necessity. But for many of us with cold winters, it’s April through October, per our Veterinarian’s recommendation. Being from Minnesota, tick-borne illnesses in dogs are very common, and not just Lyme’s. My mother has a cabin in northern Minnesota and all four of her shih-tzus have contracted some form of tick-borne illness from deer ticks.  11121943_1136831179676385_7852837262015505958_oThere are a variety of topical, spot-on treatments and oral medications that are very effective. I’ve used K-9 Advantix 2 on my three terriers for years and it has been very effective. Seresto is a new flea and tick collar that claims to be effective for 8 months, so no more forgetting to apply on a monthly basis. I simply jot down the dates in my monthly planner for easy reference. Shop around for the best price. Costco and 1-800-PetMeds are two good options, but my veterinarian now offers rebates to make medications more affordable. If you’d like to try natural flea and tick preventatives, those are available as well. Discuss your options with your vet for additional advice.
  2. Heartworm – Heartworm is transmitted by mosquitoes, a summertime staple, unfortunately. However, unlike twenty or thirty years ago, there is treatment available for heartworm. But it is a painful and risky treatment, that can require a dog’s activity to be limited for as long as two months. The best thing you can do for your pet is prevent heartworm all together by treating him or her monthly. My dogs are tested each spring with a simple blood test, and then treated monthly until a hard freeze in the fall, with Heartgard. Talk to your vet for more information. 1010551_678388688853972_2026449562_n
  3. Does your dog love to garden? Something about all that dirt and lovely smelling compost proves an irresistible combination to canines. We flower gardeners can get very frustrated by Fido’s garden forays. However, it’s not just a nuisance. It can also be dangerous. Many perennials are toxic to dogs: begonia, coleus, foxglove, gladioli, aloe, ferns, and ivy are just a few. For a complete list of toxic perennials, check the ASPCA list. Also, be aware of what you are using as mulch. Cocoa bean mulch smells delicious to dogs, but is harmful if ingested. If you think your dog has consumed a toxic plant, check the list and contact your vet immediately.
  4. Who doesn’t love a summer picnic or barbecue? I know my dogs can’t resist a little nibble of hamburger or a baby carrot handed out on the sly. But be aware of the foods that are toxic to dogs. No guacamole or fruit salad. Avocados, onions, and grapes are just a couple of foods dogs should never eat. For a more complete list check out this link from the Humane Society.lg_1299951_1372199250
  5. Sunscreen for dogs?  Did you know that dogs can suffer the harmful effects of the sun’s UV rays, too? White dogs and short-haired dogs are especially susceptible to sunburn. Here is a list from Cesar’s Way – Canine Skincare Awareness of helpful tips for keeping your dog sun-safe this summer.
  6. Swimming. I know many of my friends with water dogs and retrievers think the sight of my little stubby-leggers wearing flotation devices is hilarious. Dogs instinctively know how to swim right? Well, yes, but many breeds with flat snouts and stubby legs are very weak swimmers. They should never be left unattended around a pool. If you boat with your dog, a life jacket for a dog who suddenly jumps can be a lifesaver. Outward Hound makes great flotation devices for pets. 278406_244044452288400_3410829_o
  7. Lake Water. It is never a good idea to let your dog drink lake water. Certain types of blue-green algae can be toxic to dogs. Also, many smaller lakes are chemically treated. Rinsing your dog after a good swim can help avoid skin reactions and take care of that delightful fish smell he picked up on the beach.
  8. Extreme Heat – Always provide plenty of fresh water for your pets, indoors and especially outdoors. If your dog is going to be outside for any length of time, make sure he or she has access to a shady spot, such as under trees, patio umbrellas, or in a dog house.190253_138945479464965_743003_n
  9. As much as your doggie loves to accompany you on your errands, it’s best to leave him home in the summer months. Studies show that when the temperature is 85 degrees outside, the temperature inside a parked car can rise to 90 degrees within 5 minutes, 100 degrees within 10 minutes, and 120 degrees within 30 minutes. It’s better to be safe, and risk a pouty pooch.
  10. Fireworks – Every 4th of July, before we leave the house for the fireworks display on the lake, we turn the air conditioner up, turn on all the televisions, close the shades and make sure our dogs are safe indoors. We don’t want them to be one of the many dogs who run away frightened by the loud booms. Many of my friends use the Thunder Shirt, which is a snug t-shirt that helps make the dog feel secure. There are also calming collars. But one of the best things you can do is desensitize your dog to loud noises. Here’s a great list of ideas you might want to trylg_1299951_1372200805

– Blogger Melanie B, a Smart Perks employee, spends her summer gardening, boating and stalking cute doggies like a crazed paparazzo.

DIY or Pay Someone to Do It For You?

drapes_1

I have a guilty secret. I must come clean. Several posts back, I blogged about my little-used sewing machine, and the piles of fabric I’d purchased, with every intention of sewing some fabulous curtains just like the ones I saw on Pinterest.

Well, the sad truth is, upon seeing similar print curtain panels at Target that I liked, at $24 a piece, my slacker tendencies kicked in. I decided to take the path of least resistance and bought my curtains instead.

Yes, I admit it. I did not DIM (Do-It-Myself.)

However, before I tattoo Pinterest Wannabe to my forehead, I have decided that sometimes it’s okay not to be able to do everything.
As much as we’d like to believe that, given the time, we could tile a kitchen backsplash that would make Michelangelo weep, some things are just better left to the professionals.

Luckily the advent of a thriving online marketplace has made it easier than ever to hire talented, ethical, reliable and professional service, craft and trades people.

Sometimes we want to attempt to tackle projects and repairs ourselves, whether our motivation is saving money or exercising our DIY-muscles.

But, it’s also perfectly okay to say, “I don’t have the time or the patience right now to do this on my own.” And that’s when you can dive into the ever-expanding and incredibly customer-friendly world of online home service providers for everything from sewing projects and repair work to painting, landscaping – there’s a professional for just about any task you need done. You can even hire a grazing goat service. Seriously! See Amazon Home Services under Other Services.

So, who are the key players?

Well, of course there’s the venerable, subscription-based Angie’s List with its convenient mobile app, Snapfix, that lets you snap a quick pic of whatever needs doing, such as having a retaining wall built or blinds installed, and you’ll receive multiple bids back for your project.
Thumbtack_-_Accomplish_your_personal_projects_-_2015-04-14_16.03.39

But, there are also many newcomers on the home services scene that do all the legwork of finding a professional for you for free, from TaskRabbit, pro.com and ThumbTack (who received a $100 million dollar vote of confidence from Google in August 2014) to the just-launched Amazon Home Services.

Dashboard_-_Thumbtack_-_2015-04-14_12.37.37Thumbtack has been around since 2008 and is the company I have used myself, most recently to find a pet sitter in my area within my budget that could meet my specific needs, caring for three dogs in my home, a 6-month old puppy and another with a LOT of issues.

When working with one of these companies, you’ll provide a summary of the service you need, whether it’s a fence installation or pet-sitting. Then they will analyze the request and provide you with bids on the project. Some companies like pro.com will charge a flat hourly rate. You don’t pay for the service of Thumbtack or Amazon Home  Services. Their Pros pay to bid on your job, or pay the company a percentage of the total job cost. That’s how Thumbtack and others make their money.

TheifWorking with Home Service Providers (HSPs) can eliminate the “meeting in a dark alley,” fear you get when dealing with Craig’s List, or a stranger off a supermarket bulletin board. All of the companies I’ve mentioned conduct thorough background checks on their pros, including scouring court records, sex offender registries, national and local court filings and criminal databases, and bankruptcies, judgments and liens. All customer reviews are verified to ensure they were written by actual human beings who received the services.

Amazon Home Services (AHS) has a clear advantage over its competition, solely based on the outstanding reputation of its parent company. If you buy a flat-screen television on Amazon, there’s now a button right there online to hire an installer to mount it for you with AHS, sparing you the hassle of having to find a contractor on your own. It’s the proverbial one-stop-shop.Amazon_Home_Services_Amazon.com_-_2015-04-14_15.58.59

Then, is there anything worse than taking time off work to meet a repair person and be stood up without so much as a phone call? The likelihood of that happening to a provider listed with Amazon is slim to none, as anyone who has experienced Amazon’s amazing customer service can attest.

Amazon.com_Happiness_Guarantee_-_2015-04-14_16.10.03Amazon’s services are covered by an A-to-Z guarantee and a price match. Plus, their providers must meet ongoing performance targets, including responsiveness, quality and ratings. I personally love Amazon. I am a proud Prime Member and I’m anxious to try their services. But I have to be honest, in my service area the search results were pretty slim pickings right now.  The majority of categories had no providers available within my zip code. However, they just launched, and integrated with TaskRabbit in March, so I’ll check back in a couple of months when I’m sure the service offerings in my area will be more robust.

The other drawback worth mentioning, from my experience is that for emergency repairs, say your hot water heater goes out on the Saturday of Labor Day weekend, you’re probably not going to want to wait around for estimates. That’s when you may want to turn to Mr. Google for assistance.

110a46832bb3764a2e87ad55fc3d1651

My Secret Garden by Marjorie Wallace

And there  you have it. I freely admit it. While I would love to devote my every waking hour to recreating an amazing stone garden path that looked like it came straight from a storybook myself, I have a garden that needs tending, books that need reading, and dogs that need a rigorous round of tug-of-war or two. So maybe when it comes to that romantic garden path, I might just swing over to the online marketplace and see how much  local landscapers would charge. What have I got to lose?

– MB, Smart Perks blogger, crafter, gardener, reader, cupcake lover, social media junkie, shopping enthusiast & dog mom

Ta Dah! Welcome Our New Baby…

10480163_1087358014623702_3200225794387421877_n

Meet My New Puppy Eloise!

Okay, so I did get a new puppy. Weezy is a Cairn Terrier, and almost 5 months old now. She looks very sweet, and has a keen fashion sense, (especially color-coordinating her stylish ensembles with her accessories, aka toys,) but don’t let the face fool you. Little Hannah Lecter will bite your nose off, if given the chance, which is why she started obedience training on Saturday.

But that wasn’t the new baby I was referring to. Last week we launched the new Smart Perks website with a bright, bold design, fun new features, and, of course, what Smart Perks is all about, great money-saving offers on merchandise and services.

Smart_Perks_screenShot

I don’t know if you’ve ever launched a website before, but months of planning goes into it. And not just the fun stuff, like making color choices, developing logos, artwork, and fun features; such as games, weather-bugs, and weekly merchandise deals.

There are also wire-frames to be created (don’t ask,) and seemingly endless discussions of navigation to make the site user-friendly and intuitive, so that ultimately site visitors can get to the deals that much faster.

The whole Smart Perks team got together and brainstormed content ideas, like the featured tips from experts, on everything from electronics to home improvement, decorating and organization, whatever we thought our Smart Perks audience could use to make their lives easier, using less of their precious resources – time and money, and help them work smarter, not harder, so they can simply relax and enjoy the good life!

After that came the coding, coding, and more coding from our brilliant tech team. And testing. Weeks of testing on every browser and mobile device we could get our hands on.

Finally the day came last week with much fanfare and a mostly pain-free labor, as we launched our new baby out into the world.

Pinterest_-_2015-03-10_11.24.30We’re proud of the new SmartPerks website, our Facebook page, Twitter feed, Pinterest boards,  and this blog. Our team consists of creative, passionate people with a wide variety of interests, hobbies, and talents, and we want to share them with you. We want you to look forward to more posts like the ones you’ve seen so far, including what we hope will be helpful information, tutorials, and inspiration. Maybe even some tips on training your new puppy – Miss Weezy has provided lots of hands-on experience.

So I hope you’ll stop by the new SmartPerks website, say “Welcome to the World, Baby,” and take a look at what we have to offer. There are over 35 new offers in the Spring Smart Perks mailer. If you’ve never received a Smart Perks mailing, visit the new site and sign up. There’s also a great offer for a free $25 gift card, when you receive your first free Smart Perks mailing. Smartperks.com – see you there!

-MB

When she’s not blogging for Smart Perks, Melanie is staring glassy-eyed at Pinterest, her Pin It finger splinted from overuse. Besides crafting, gardening, shopping and cupcakes, the loves of her life are her three naughty terrier pups, the smartest and best-looking dogs in the world, and her husband.

Seed Starting for Newbies – Greetings from Zone 4!

united beauty of vegetables

Greetings from Zone 4? No, that is not the title of a science fiction novel.

Zone 4 is the plant hardiness zone for Smart Perks headquarters in Minnesnowdah. But regardless of where you live in the U.S., with spring right around the corner, it’s a good time to start thinking about seed-starting for your vegetable garden.

I’ve started seeds indoors for over a decade now. It’s a great way to save money by avoiding nursery prices, and I typically have more than enough plants leftover after mine are in the ground, to share with friends and family.

Have you seen the price of a grocery store tomato lately? You shouldn’t have to make a choice between a child’s college education and a tomato! Besides the savings, starting seeds indoors will bring a little summertime to your home during a cool, damp March.

To get started, you need to decide which veggies you want to plant, depending on your personal tastes and growing space. If you live in apartment, a lot of plants can be grown in a couple big pots on a deck or outside your front door.

I usually like to start cucumbers, tomatoes, and beans indoors. Herbs, especially chives and basil, are easy and fun to grow, because they smell DELICIOUS as soon as they sprout. You can dry them and use them throughout the year. Fresh herbs are the best, and you really can taste the difference in your recipes!   mozzarella di bufala con pomodoro e basilico

Then head to your local hardware, discount store or nursery and pick out your seeds. Check the back of your seed packets for the zone hardiness of the plant, and how much time you’ll need to allow if you’re starting indoors, as well as time until harvest. The typical amount of time for indoor growing is 6-8 weeks. Here in Zone 4 we shouldn’t put our plants in the ground until after May 15th, when the danger of a killing frost is USUALLY passed.

I usually start my seeds around St. Patrick’s Day or during the NCAA Final Four. I remember in previous years, sitting on my kitchen floor, with seed starter soil everywhere, listening to a tournament game, while trying to get wet soil out of my grout. That was before I wised up and started using peat pellets.

While some hardier veggies like lettuce and radishes can be sown directly in the ground in early spring, others have to wait until the ground warms up. Tomatoes, for instance, thrive in heat. If the temps are too cold, or the weather too cloudy, their growth can be stunted. Tomatoes are an excellent plant to start indoors.

Then you’ll need a tray that will allow adequate drainage and a clear, vented cover. I recommend investing in a multi-square version like the Jiffy Starter Kit if you’re a newbie. jiffy-greenhouseIt has everything you’ll need, except the seeds, light and water, and will cost approximately $10 or less. Plus the tray can be used again next year.

You can buy the growing medium loose, or in a little mesh-covered peat pellet. Trust me…the peat pellet is the way to go to avoid a mess! You soak them in hot water for about 5 minutes and voilá…they expand to just the right size. It’s pretty cool to watch. Kids will love this, too.

There’s even a little hole in the top of the mesh to place your seeds in. So all you have to worry about is checking the back of your package for seed-planting depth, and how many seeds to plant in each pellet. It can take anywhere from 4 to 14 days for seedlings to emerge.seedling

The three most important words of wisdom I can give you, after years of making every mistake imaginable, are to separate, ventilate, and rotate!

  1. Separate. You’ll typically plant multiple seeds in a peat pod, because all the seeds may not sprout. However, sometimes they will and you’ll need to separate or thin out the young sprouts. If you don’t, once they start to leaf, they’ll crowd each other out, competing for space and nutrients. Your plants won’t thrive, and when it comes time to plant, you’ll have a bunch of tangled, thin, and gangly plants.
  2. Rotate. Placement of your seeds is key. You need a warm, sunny place that gets the most light over the course of the day. Seeds need warmth to germinate. So a window near a heat vent is optimal.  You can buy a small grow light and warming mat on which to place your seed tray for around $30-$40. Although I never have. Remember these investments sound like a lot, but once you have the right equipment, you’ll have it forever. When the seeds have sprouted, you’ll need to rotate the tray at least once a day or more, so that neither side has to lean toward the sun. Optimally you want light coming from directly above, so that your young seedlings will grow straight up and have strong healthy stems. Believe me, I’ve had many years, where I’ve ended up with spindly, sideways tomato plants, that have eventually borne fruit, but it certainly wasn’t easy to put a tomato cage on a horizontal plant.
  3. Ventilate. As I mentioned, seeds to stay covered and warm in the first several weeks, hot and moist like a greenhouse with minimal ventilation. But once they have sprouted, you’ll want to keep the soil moist, but not drowning, and ventilate or you’ll have moldy soil. Once the plants are touching the lid, you can remove the lid completely.

You’ll want to watch the bottom of your mesh peat pods for exposed roots, transplanting them to larger pots filled with regular potting soil until it’s time to put them in the ground. Potting up tomato seedlings © Arena Photo UKAlways refer to the back of your seed packs for more specifics, like when to pinch the first leaves from the stems.

And when you’re ready to put your seeds in the ground, remember, the plants need to be gradually acclimated to the direct sun outdoors, and other elements. So you can take them out for a couple of hours each day. This is called hardening off your plants, and you can read more about the process online.

Starting seeds indoors has been one of the best experiences I’ve had as a novice gardener, and I’ve learned so much from my mistakes, without reading stacks of books, or spending a fortune. The results have been great savings, and the greatest rewards…FRESH VEGGIES and the satisfaction of knowing I grew them myself. Have your own tips or experiences with seed starting? Please share in the comments!

Young plant in a pot ready for planting

-MB

When she’s not blogging for Smart Perks, Melanie is staring glassy-eyed at Pinterest, her Pin It finger splinted from overuse. Besides crafting, gardening, shopping and cupcakes, the loves of her life are her three naughty terrier pups, the smartest and best-looking dogs in the world, and her husband.